快速开始
安装
shell npm i @chamn/engine @chamn/model @chamn/render shell pnpm i @chamn/engine @chamn/model @chamn/render shell yarn i @chamn/engine @chamn/model @chamn/render 你可以在你的机器上的任何地方运行 create astro,因此在开始之前无需创建一个新的空目录。如果你还没有为你的新项目准备一个空目录,向导将会自动为你创建一个。
如果一切顺利,你将看到一个成功信息,随后是一些推荐的后续步骤。现在你的项目已经创建好了,你可以 cd 进入你的新项目目录开始使用 Astro。
由于演示用例使用了 antd 以及 @chamn/demo-page 库(这不是必须的,只是这里做演示使用),所以你还需要安装:
shell npm i antd @ant-design/icons @chamn/demo-page shell pnpm i antd @ant-design/icons @chamn/demo-page shell yarn i antd @ant-design/icons @chamn/demo-page 用法
创建一个 Editor.tsx 文件,将以下代码拷贝进去:
import { BasePage, Material } from '@chamn/demo-page';import { Button, message, Modal } from 'antd';import React, { useCallback, useEffect, useState } from 'react';import ReactDOM from 'react-dom';import ReactDOMClient from 'react-dom/client';import '@chamn/engine/dist/style.css';import { Engine, EnginContext, InnerComponentMeta, plugins } from '@chamn/engine';import { RollbackOutlined } from '@ant-design/icons';import './index.css';
const { DisplaySourceSchema, DEFAULT_PLUGIN_LIST } = plugins;
const win = window as any;win.React = React;win.ReactDOM = ReactDOM;win.ReactDOMClient = ReactDOMClient;
export const App = () => {  const [ready, setReady] = useState(false);  const [page, setPage] = useState(BasePage);
  useEffect(() => {    // 从本地获取 page schema    const localPage = localStorage.getItem('pageSchema');    if (localPage) {      setPage(JSON.parse(localPage));    }    setReady(true);  }, []);
  const onReady = useCallback(async (ctx: EnginContext) => {    const designer = await ctx.pluginManager.onPluginReadyOk('Designer');    const reloadPage = async () => {      setTimeout(() => {        const designerExports = designer?.export;        designerExports.reload();      }, 0);    };
    // 获取 引擎 工作台对象    const workbench = ctx.engine.getWorkbench();
    // 自定义顶部 bar    workbench?.replaceTopBarView(      <div        style={{          width: '100%',          height: '100%',          display: 'flex',          alignItems: 'center',          justifyContent: 'flex-end',          paddingRight: '10px',        }}      >        <div className="logo">Chameleon EG</div>
        <a target="_blank" href="https://github.com/hlerenow/chameleon" rel="noreferrer">          <Button style={{ marginRight: '10px' }}>Github </Button>        </a>
        <Button          style={{ marginRight: '10px' }}          onClick={async () => {            const res = await ctx.pluginManager.get('History');            res?.export.preStep();          }}        >          <RollbackOutlined />        </Button>        <Button          style={{ marginRight: '10px' }}          onClick={async () => {            const res = await ctx.pluginManager.get('History');            res?.export.nextStep();          }}        >          <RollbackOutlined            style={{              transform: 'rotateY(180deg)',            }}          />        </Button>
        <DisplaySourceSchema pageModel={ctx.engine.pageModel} engineCtx={ctx}>          <Button style={{ marginRight: '10px' }}>Source Code</Button>        </DisplaySourceSchema>
        <Button          style={{ marginRight: '10px' }}          onClick={() => {            reloadPage();          }}        >          Refresh Page        </Button>        <Button          style={{ marginRight: '10px' }}          onClick={() => {            const src = '/#/preview';
            Modal.info({              closable: true,              icon: null,              width: 'calc(100vw - 100px)',              centered: true,              title: (                <div>                  Preview                  <Button                    size="small"                    style={{                      float: 'right',                      marginRight: '30px',                    }}                    onClick={() => {                      window.open(src);                    }}                  >                    Open in new window                  </Button>                </div>              ),              content: (                <div                  style={{                    width: '100%',                    height: 'calc(100vh - 200px)',                  }}                >                  <iframe                    style={{                      border: '1px solid #e7e7e7',                      width: '100%',                      height: '100%',                      borderRadius: '4px',                      overflow: 'hidden',                    }}                    src={src}                  />                </div>              ),              footer: null,            });          }}        >          Preview        </Button>        <Button          type="primary"          onClick={() => {            const newPage = ctx.engine.pageModel.export();            localStorage.setItem('pageSchema', JSON.stringify(newPage));            message.success('Save successfully');          }}        >          Save        </Button>      </div>    );  }, []);
  if (!ready) {    return <>loading...</>;  }
  return (    <Engine      plugins={DEFAULT_PLUGIN_LIST}      schema={page}      // 传入组件物料, 这里使用内置的基础物料以及 测试物料信      material={[...InnerComponentMeta, ...Material]}      onReady={onReady}    />  );};
添加 css 让编辑器撑满窗口
html,body,#root {  width: 100%;  height: 100%;  overflow: hidden;}
body {  margin: 0;  padding: 0;}
.logo {  height: 100%;  font-size: 20px;  display: flex;  align-items: center;  margin-left: 20px;  font-weight: bolder;  margin-right: auto;}
配置 render.umd.js
因为渲染画布是在 iframe 中运行,所以需使用 umd 模式的 js,然后让 iframe 加载。在 vite 构建工具下,有以下三种配置方式:
方式一:使用 ?url 后缀导入(推荐)
这是最简单的方式,直接使用 vite 的 ?url 后缀导入文件 URL,无需额外配置:
import renderAsURL from '@chamn/render/dist/index.umd.js?url';
<Engine  plugins={DEFAULT_PLUGIN_LIST}  schema={page}  material={[...InnerComponentMeta, ...Material]}  assetPackagesList={assetPackagesList}  onReady={onReady}  renderJSUrl={renderAsURL}/>;
或者从 node_modules 路径导入:
import renderAsURL from '../../node_modules/@chamn/render/dist/index.umd.js?url';方式二:使用 vite-plugin-static-copy 插件
使用 vite-plugin-static-copy 插件在构建时自动将文件拷贝到输出目录:
首先安装依赖:
shell npm i vite-plugin-static-copy shell pnpm i vite-plugin-static-copy shell yarn i vite-plugin-static-copy 然后在 vite.config.ts 中配置:
import { defineConfig } from 'vite';import react from '@vitejs/plugin-react';import monacoEditorPlugin from 'vite-plugin-monaco-editor';import { viteStaticCopy } from 'vite-plugin-static-copy';
export default defineConfig({  plugins: [    react(),    monacoEditorPlugin({}),    viteStaticCopy({      targets: [        {          src: './node_modules/@chamn/render/dist/index.umd.js',          dest: './',          rename: 'render.umd.js',        },      ],    }),  ],});
这样构建时会自动将 render.umd.js 拷贝到输出目录的根目录下,然后使用相对路径:
<Engine plugins={DEFAULT_PLUGIN_LIST} schema={page} material={[...InnerComponentMeta, ...Material]} assetPackagesList={assetPackagesList} onReady={onReady} renderJSUrl="./render.umd.js"/>方式三:使用 CDN 或自定义路径
如果使用 CDN 或其他自定义路径,可以直接传入 URL:
<Engine plugins={DEFAULT_PLUGIN_LIST} schema={page} material={[...InnerComponentMeta, ...Material]} assetPackagesList={assetPackagesList} onReady={onReady} renderJSUrl="https://cdn.example.com/render.umd.js"/>或者使用相对路径:
<Engine plugins={DEFAULT_PLUGIN_LIST} schema={page} material={[...InnerComponentMeta, ...Material]} assetPackagesList={assetPackagesList} onReady={onReady} renderJSUrl="./public/render.umd.js"/>配置 monaco-editor 构建
因为引擎使用了 monaco-editor 代码编辑器所以需要配置相应的构建配置
Vite
import { defineConfig } from 'vite';import react from '@vitejs/plugin-react';import monacoEditorPlugin from 'vite-plugin-monaco-editor';
// https://vitejs.dev/config/export default defineConfig({  plugins: [react(), monacoEditorPlugin({})],});
Webpack
运行
将 Editor.tsx 页面作为你项目中的一个页面,运行,打开对应的地址你将会得到一个编辑页面
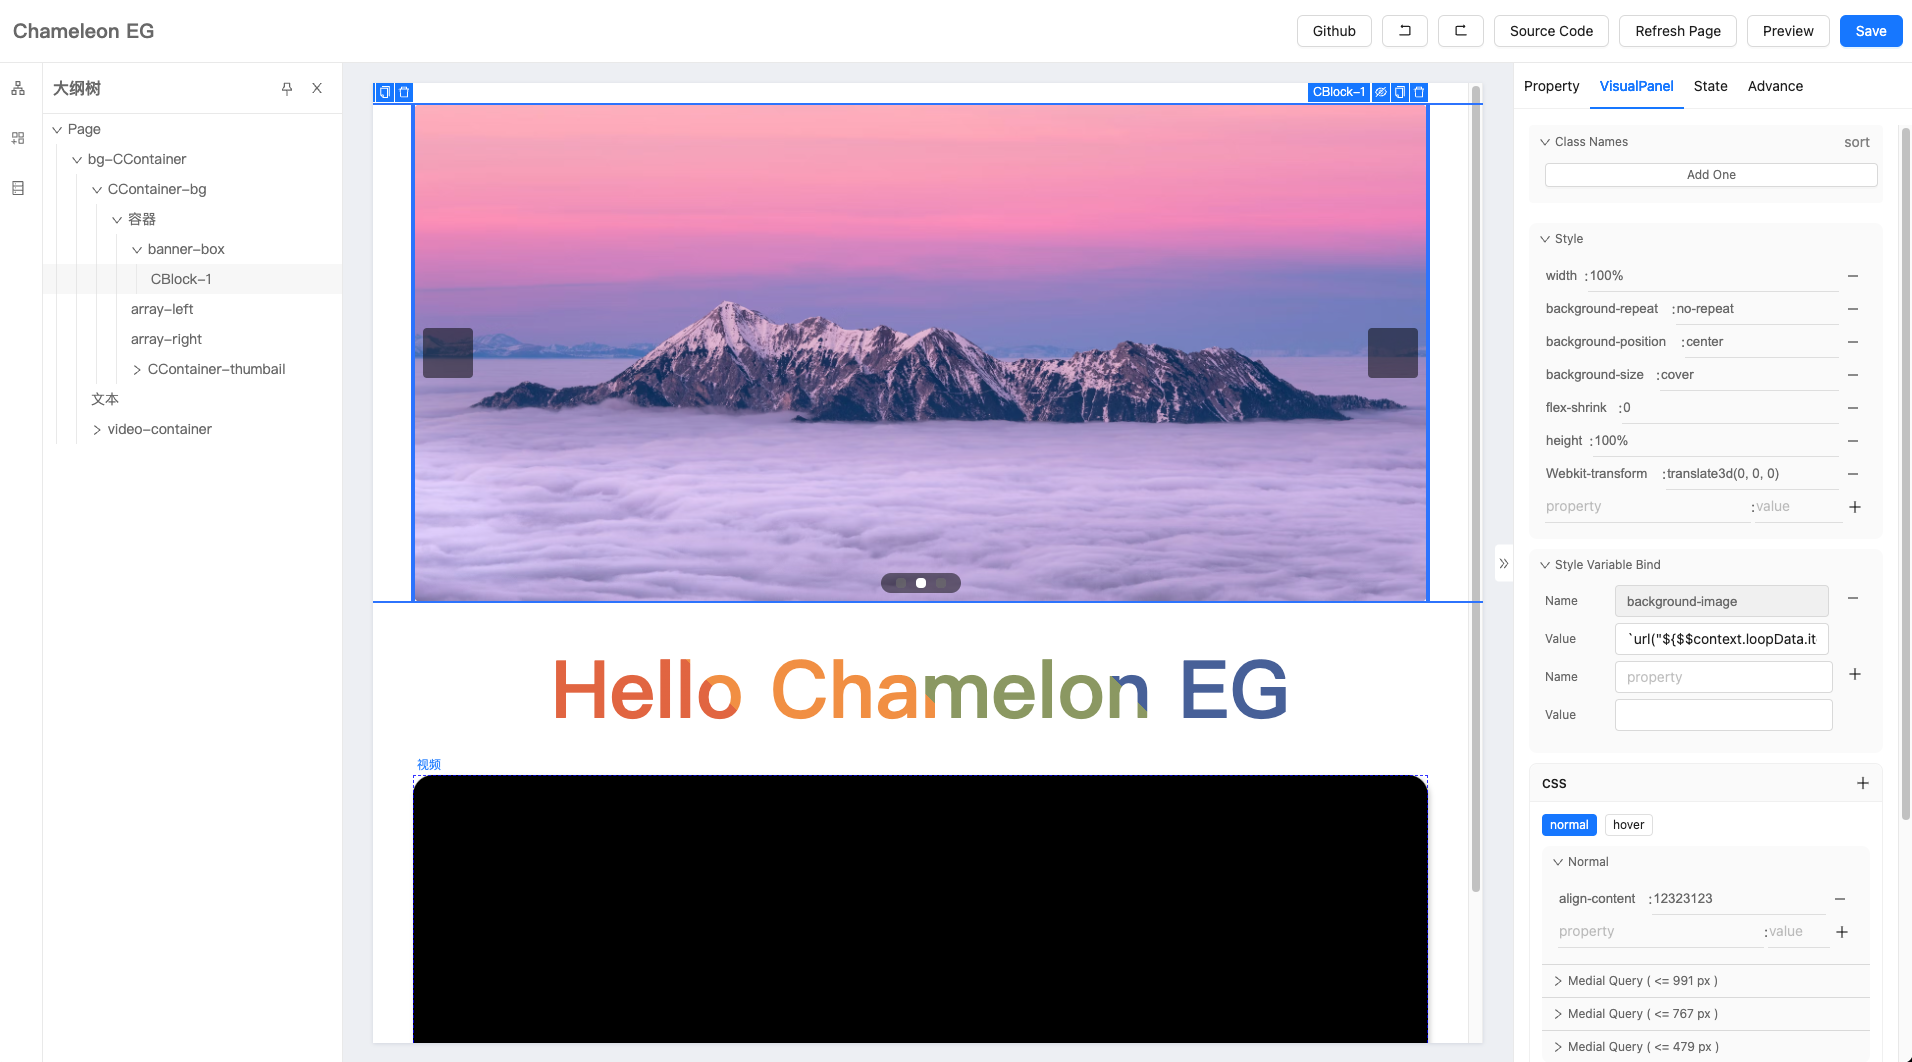
Good Luck! :)